Burst Pipe, Leaky Roof or Sewer Backup?
Learn the fastest steps to reduce water damage, prevent mold, and prepare for restoration before emergency crews arrive.
Water Damage in Your Home: What to Do Before Emergency Help Arrives
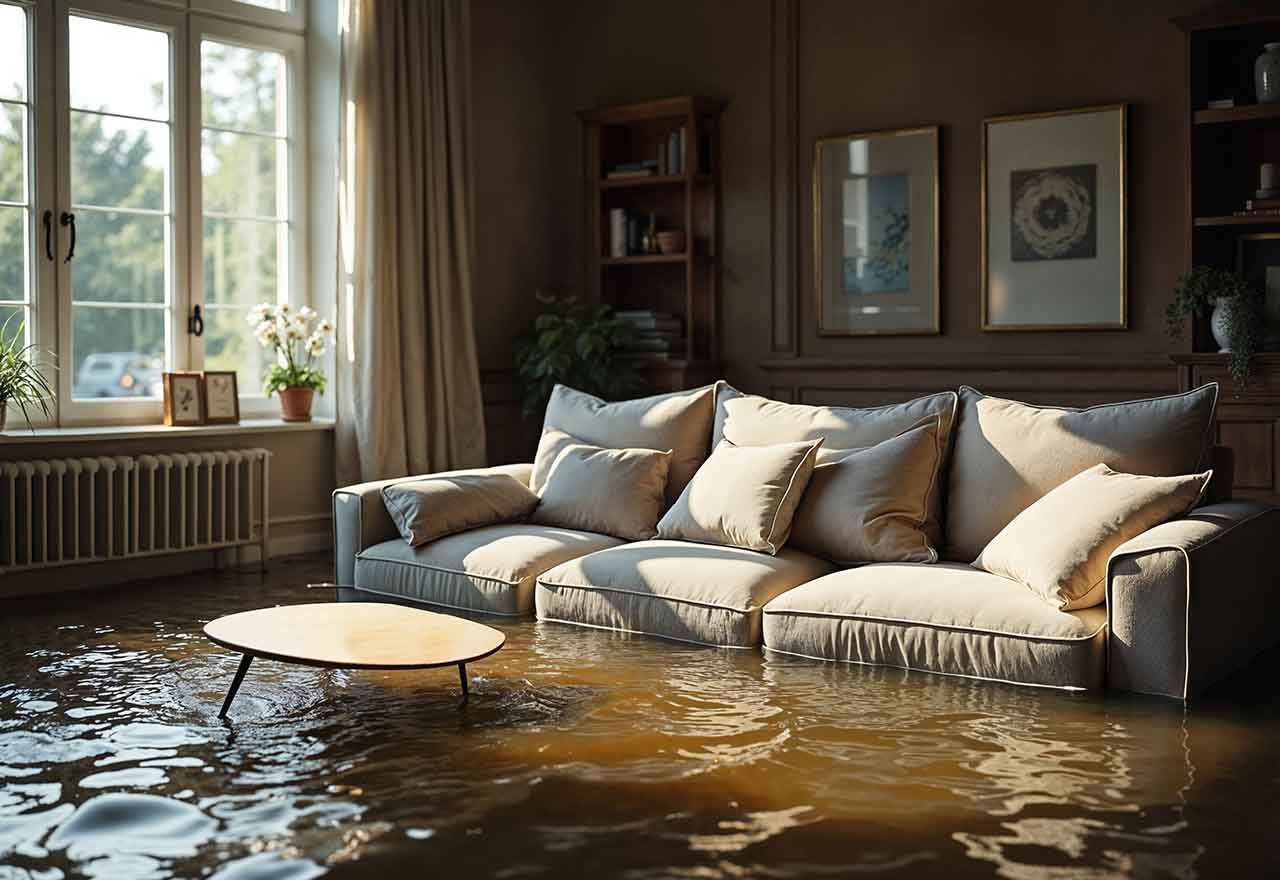
Water damage is one of the most stressful home emergencies because it escalates fast. A broken pipe, overflowing toilet, roof leak after heavy rain, or dishwasher supply line failure can soak floors, wick into drywall, and spread underneath cabinets in minutes. The good news: the steps you take in the first hour can dramatically reduce repair costs, prevent mold growth, and protect your belongings. This guide explains exactly what to do before the restoration team arrives, with safety-first actions that help you stabilize the situation and support a smoother insurance claim.
Step 1: Ensure the Area is Safe (Electricity + Water Damage = Danger)
Before you grab towels or start moving furniture, do a quick hazard check:
- If water is near outlets, cords, appliances, or ceiling fixtures, assume electrical risk.
- Do not walk into standing water if electricity could be involved.
- If it’s safe to access, turn off power at the breaker to the affected rooms.
- If you can’t safely reach the panel, stay out of the area and wait for professionals.
Also check for slipping hazards, sagging ceilings, and contaminated water (more on that below). Safety is always the priority—property can be replaced, people can’t.
Step 2: Identify the Water Damage Type (Clean vs. Contaminated)
Your cleanup approach depends on what kind of water you’re dealing with:
- Clean water: burst supply line, tap left running, melted snow leak (initially)
- Grey water: dishwasher/washing machine overflow, some sump issues
- Black water: sewer backup, toilet overflow with feces, floodwater from outside
If it’s grey/black water, avoid skin contact, keep kids and pets away, and don’t try to “dry it out” with fans—this can spread bacteria through the air. These situations typically require professional remediation and proper disinfection.
Step 3: Stop the Water Damage Source Immediately (The #1 Cost Saver)
If the source is plumbing, stopping the flow is your biggest win.
- For sinks/toilets: shut off the fixture valve (usually behind/under).
- For appliance lines: shut off the appliance supply valve (dishwasher, fridge, washer).
- If that doesn’t work: shut off your home’s main water valve.
For roof leaks, you usually can’t fix the roof during a storm, but you can reduce interior damage:
- Place buckets to catch drips.
- Move items out from under the leak.
- If a ceiling is bulging with trapped water and there’s no electrical risk, you can carefully relieve it into a bucket to reduce collapse risk (if you’re unsure, don’t do this).
Step 4: Call Emergency Water Damage Restoration & Start a Claim
Even if the water “looks small,” it can be hiding under floors and behind walls. Call a 24/7 water damage restorationcompany as soon as possible so they can begin professional water extraction, moisture mapping, and controlled drying.
If you plan to use insurance, notify your provider promptly, but don’t delay mitigation while waiting for approvals. Most insurance policies require homeowners to take reasonable steps to prevent further damage.
Step 5: Document Water Damage (For Insurance and Peace of Mind)
Before you start moving too much (and when safe), take:
- Wide photos/video of each affected room
- Close-ups of damage (wet lines, ceilings, flooring)
- Photos of the source (broken pipe, failed connector)
- A quick list of damaged items and approximate values
Save notes such as when it started, what you shut off, and who you called. This makes claim conversations easier and reduces disputes later.
Step 6: Protect Belongings and Reduce Secondary Damage
Now you can start limiting loss:
- Move valuables, electronics, and important documents to dry areas.
- Lift furniture legs onto wood blocks or foil to prevent staining and swelling.
- Pull rugs up if water is spreading underneath.
- Lift curtains off wet floors.
- Remove wet cardboard boxes (they trap moisture and break down quickly).
If the water is contaminated (sewer backup), avoid dragging items through it—contain the area and wait for professionals.
Step 7: Remove Standing Water (Extraction Beats “Drying”)
Drying is important—but extraction comes first. The less water left in the home, the less damage it causes.
For clean water, use:
- Wet/dry shop vac
- Mop + bucket
- Towels and wringing
- Squeegee toward a drain (if available)
For grey/black water:
- Skip the shop vac and DIY extraction if possible.
- Limit exposure and focus on containment until trained crews arrive.
Step 8: Begin Controlled Drying of Water Damage (Without Making It Worse)
Once standing water is removed, start reducing humidity and improving airflow:
- Run dehumidifiers continuously if you have them.
- Use fans to move air across wet surfaces (not directly into contaminated areas).
- If outside air is dry, open windows.
- If it’s humid/raining, keep windows closed and rely on dehumidification.
Avoid blasting high heat. Warm air can help, but uncontrolled heat + humidity can worsen warping, odor, and condensation.
Step 9: Prevent Water Damage Mold Growth (Time Is Not Your Friend)
Mold can begin growing quickly in damp materials. The goal is to prevent moisture from staying trapped in porous spaces:
- Remove soaked items that won’t dry well (wet cardboard, saturated padding).
- If carpet is soaked, lift edges where possible to improve airflow underneath (clean water only).
- Consider removing baseboards to reduce wicking and help wall drying (only if you’re comfortable doing so).
Do not paint over wet drywall or “seal in” moisture. That often causes bigger remediation later.
Step 10: Know What NOT to Do
These common mistakes increase total damage:
- Don’t assume the water is gone because the surface “looks dry.”
- Don’t run electrical devices that got wet.
- Don’t use fans on sewer backups (can spread contaminants).
- Don’t delay help—hidden moisture is where the big costs start.